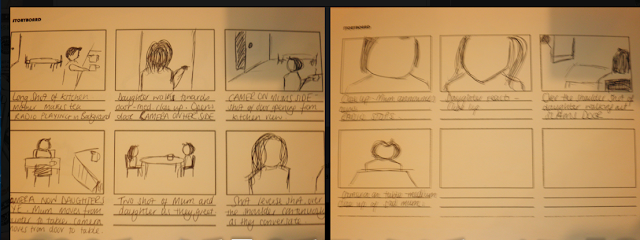
Prelim storyboard
In class we were given a preliminary match cut exercise. We had to create a sequence in which a person opens a door then shares dialogue with another character. In order to prepare for this as a group we decided what plot we were going to use and the type of sequence, e also had to think of
the bases behind the dialogue.
Before planning a film a story board is essential as it allows you to create an outline of the ideas you will like to include. Creating an outline of a storyboard help us think ahead of what the film will look like once it is finished allowing us to work out an order for the sequences. In the lesson we had time to discuss what we wanted to be in the storyboard allowing each member of our group participate in what they wanted in each scene. Doing this aloud us all to note down what we wanted with the image and description of the shot we would use and where it will be set. Planning a story board aloud us to put down what we were going to do so that when we start filming we were able to get on with the task rather than plan what we were going to do.
When planning our prelim we created a storyboard which helped us outline the key parts we were going to act and focus on. The storyboard aloud us to see what the two characters would be doing and to also show the positions the camera will be taking to film this.
As shown below here is a storyboard i drew up to demonstrate what will need to be done in the prelim brief. Looking below the illustrations helped us see clearly where and when it needed to be filmed.
Once we finished drawing up our storyboard as shown above we then took pictures individually which was then uploaded to Final Cut. Once all the single images were uploaded we then put them in order from start to finish. We then put the clips in order so it created a small animated film when played altogether.
Below is a short animatic of the prelim storyboard made.
Below is a short animatic of the prelim storyboard made.
Prelim animatic storyboard Final Cut slide show
Overall this task was very useful in being able to practice filming a timed sequence. We were also able to practice drawing and illustrating a storyboard which we followed when doing this. This will later on help us plan for the opening of our thriller as we will have a clear idea of how to create and illustrate a story board.

No comments:
Post a Comment