Monday, 19 December 2011

Health and Saftey Tutorial

Health and Safety Tutorial Overview
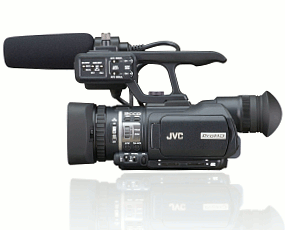
In the health and safety tutorial we got shown the do’s and don’ts of using professional cameras. 
We were introduced to the camera, the memory card and the battery that goes in it and how and where to insert them in the allocated slots.
We learnt the different buttons and functions of the camera eg. the buttons to record, stop, playback previous recorded footage, and with constructing the tripod how to secure the camera 
onto the it until it locks without causing any damage. We learnt how to use the zoom in and out button, 
how to turn the camera from auto to manual and vice versa and how we shot use the camera in different lighting issues.
We got shown a few shots about framing, spacing of the frame-how it shouldn’t be too above the 
subject or too far to the right or left, and how two shots and over the shoulder shots should look like. And got told a valuable source for a good frame called the 'rule of thirds'.
Reminders told:
·         Never leave the camera out in the rain
·         Take care of the camera and use it safely
·         Never leave the camera in an unsafe place
·         Always return the camera in college at the time set


Equipment:


JVC Camcorder


Battery Pack


Memory Card


Tripod

Saturday, 17 December 2011

Feedback from Collateral remake

Overall the feedback that was given back from us was both positive and negative. This was very helpful as it then gave our group the chance to reflect upon this and then see what we could do to improve in the future. 
Whist people watched our remake of collateral most people were shown to be confused in the way that the story went, this was because the continuity was unclear making viewers in this case confused about the characters within the scene. This was shown when we saw the main character being used in the same scene more than once which showed the character being in more than one place at a time. This was on error that our group realised needed to be looked into , for us not to make the same mistake again. However even though there was negative points about the collateral remake there were also positive aspects that were recognised. One aspect was the lightening, most people liked the lightening used as they said it clearly showed the detail upon the characters face allowing viewers feel the emotions perceived on them which in most cases was serious. The music was also another aspect that was positive once we had our feedback, this was because it generated the mood that was shown in the clips clearly showing emotion and tension towards the audience.


Gathering feedback from various people aloud us to see things from a different perspective allowing us to see different aspects that we could improve on to make our clip as successful as the original. However  most people thought that the remake was good considering it was our first try.

Feedback from Collateral remake

Feedback

Friday, 16 December 2011

Collateral step by step

Although i have made a video of the remake of collateral a step by step has also been shown below.
Medium close up of main character (one)
This is the start of the scene where we are
introduced to the main character walking
through a crowd showing how important he
is than everyone else as we see at this point
everything is blurred as she (he)is the main focus
Close up of main character (one)
This is where a close up has been used
where the viewers are able to focus on
details upon the characters face
 
Medium close up of character (two)
This is where we are then introduced
to the second character again walking
through people, however at this stage
we see the characters are not as blurred
as the first characters as he is shown not
to be as important. This character also
represented is in a rush 
Medium close up of main character (one)
Once again a medium close up has been used
to show the scenery of and expressions of the
character.
Close up of bag dropped on the floor.
 At this point the bag drops as the character
 is shown to of bumped into the second
character at this point. This then results
 in them confusing there bags and picking up
the wrong one. This part of the scene we only
see one bag when there is meant to be two. 
Over the shoulder shot of both characters talking. 
At this point we see continuity occurs this is where
 the second character has shown to have changed places
 with someone else. Doing this create the viewers
 to be confused and makes them lost in thinking where 
the other character has disappeared to.
Medium close up
This is where the  character picks up the
 bag and walks of. Here we were supposed
 to have 2 bags to show the
mistake the main character made.  
Close up of main character (one)
Towards the end a close up has
 ben used again to show the character
walking back to her (his) destination.
Close up of behind the characters ear (one)
finally we see this shot is used to show
the view of where the character is
looking and where she (he) may be of
to.


Above is shown to be a step by step of the Remake collateral, looking above there are many strengths and weaknesses that have been identified and could be improved on. Overall this task was interesting as it made us think of how we would use this to make our own thriller openings.

Wednesday, 14 December 2011

Editing remake

Editing Collateral using final cut.


As shown in the video above once filmed the remake of collateral we then edited the clips we had filmed by using the programme final cut.
Final cut consisted of our group needing various amounts of skills and knowledge in order for us to know how to edit on the programme.

Whilst looking at the opening of the recorded clip we see the programe has been divided into two equal parts. These two parts allowed us to see what we were editing and how it will look like, once we were happy with the parts we edited we then dragged it on the timeline. During the group activity of editing the remake of Collateral we had various amounts of shots that were taken which needed to be cut down as some were long. Doing this we used the buttons 'I' and 'O' both standing for in and out where we wanted the clip to start and finish, this enabled us to shorten the clip and cut out un necessary bits such as people laughing. This was a good aspect of using final cut as we see that if there was a great clip but had a mistake it will be able to be removed though the use of the 'I' and 'O' buttons. Once we chose the clips we wanted and then cut the parts we didn't want we then changed the speed of each clip to match the original Collateral. To change the speed and duration of this we clicked the tap 'modify'  allowing us to change these settings this was changed to around 5 seconds. 

The speed of this film was very significant as it set the mood of the scene, which aloud us to build up what the characters were like. Throughout editing we see that the  editing was similar to illustrate that the editing took place on both screen allowing us to play it back once finished. The left hand side was shown to be the full film hoverer the right hand side screen illustrated the final editing clip which we then played back. Once finishing the editing of the clip we then had to add music which we thought would be very difficult. However it resulted in being easy as we took the original sound and then converted the file into a mp3 format which we then imported it into the final cut programme. When adding this to the time line we used made sure we marked where we wanted the music to start and finnish. Opposite the music tab we also turn't off any additional sound that wasn't needed to make it more effective such as people talking.

Overall the editing task was challenging but fun as we were all able to participate and learn new things about final cut, giving us the chance to apply what we learnt to our final piece.

Collateral remake

Collateral remake 

The above clip is shown to be a remake of the clip collateral. Throughout the task we had to remake the scene of collateral taking into consideration the camera lightening, cuts and the use of mise en scene. Whilst making the remake of the clip collateral we realised many faults and also things we did well. As we were making the remake of the clip we had the chance to use the cameras taking everything we had learnt and then applying it to this piece of work. Once we filmed we then used the computers and started editing on final cut this was where we had the chance to cut out bits we didn’t need and also add sound to make it more interesting. When we were making the clip there were many faults that occurred. This was a good chance where we could then look at our mistakes and then improve and make sure we didn’t make the same mistakes later on when filming our final piece.

Strengths:
Looking at the remake of collateral there were a few things that were done well making the clip easy to understand

Smooth cuts: The smooth cuts enabled us to see a clear transaction between each scene, using this made the clip look like a whole episode showing clearly what happens next. 


Correct Pace: The pace of the remake we did was significant as we see it clearly identified the characters individually. Fast and slow motion was needed in certain places and whilst using this it made it clear to the viewers why it was used in which this case was to create tension. 


Clear shots: Having clear shots enable us to see what is going on making it clear also where it has been set. 


Good setting: The setting that was based on the remake of collateral was vital as the lightening had to be bright upon the characters face allowing the audience see the expressions on the characters face. The setting was based on outside with a lot of lightening. 


Music:The music was important and was a key feature we focused on whilst doing the remake. The music was the same as the film, we found this online as we used the converter from you tube. This then aloud us to download it to the movie clip. The most significant part was the bag drop scene this was where we see the sound in the background went quiet which then focused on the bag dropping. 


Timing:The timing was on point as we see the remake was 24 seconds. Within this time we were able to film everything seen in the original version. 


Lightening:The lightening was an effective point at this part, we see that the lightening was usually based at a high key once focused on the main character this was for the viewers to see a clear and in detailed view of the characters expressions. This was very similar to the original as we saw that the lightening was usually bright when aimed at the main characters.    


Framing: the framing was clear as the viewers were clear who the main focus was on whilst watching.

s   Weaknesses:


However whilst looking at the remake of collateral we see that there were also parts that needed to be thought of more carefully as we see some parts didn’t make sense this was the problem of continuity the fact that some parts were confused


Continuity: this was the idea that the main character was used in each scene; this was a problem as the storyline wasn’t clear and made it difficult to follow (main issue)


Storyboard: The storyboard was another weakness as once we were filming most parts of the scene were missed out making it difficult to follow once remaking the clip.


Characters: This was a problem as there were a few people making it hard to film. As in the original we see that there was a crowd of people making it more effective, whilst only having 3 it made things more difficult


Editing: Whilst editing we could of used various amounts of cuts to make it more effective and not repeat them all.


Mise en scene: the lack of props also resulted in the scene we remade unclear and made the storyline confusing to understand (bags, suits etc)

    As shown above the task we did as a group was successful and was very interesting and fun to take part in. although we see there was many strengths and weaknesses this gave our group the chance to reflect upon the changes we could of made and what we will need to improve on in the future whilst making the filming for our thriller.

    Overall whilst making the remake of collateral we see that the use of framing, mise en scene and camera work were used effectively in producing a clear storyline so the viewers were able to follow however could have been improved.


Which elements of camera work, character, plot and genre inspired you most? The element that inspired me most was the camera work and the genre. The reason these inspired me was due to the way they were used and perceived in the scene of collateral. The camera work was shown to be effective as it was clear and was easy to understand. Whilst most shots such as close ups and medium close ups were used we also see that the cuts were quick and smooth this enabled the viewers who are watching waiting to suspect something that will happen to both of the characters in which this case we see they meet up. The genre also inspired me as it was shown to mostly be based on men and their jobs and how they are perceived. The men were represented in wear suits that gave the connotations of them being smart, rich and also elegant looking. 


Tuesday, 13 December 2011

Thriller analysis 'The Ring'

The Ring Poster
The Ring is based on a young journalist, who must investigate a mysterious videotape which seems to cause the death of anyone in a week of viewing it. The Ring is shown to consist of different aspects that make a successful thriller in which this case are music, editing, camera shots and the way lightening is used. Through the opening of the first sequance the music tends to be constructed from a base 
of pianos, violins and two cellos are the instruments used continuously throughout. The colours that are used also create tension in some ways as the setting is usually dark, however the characters are shown to be brighter to show the detail upon there face. The use of dark colours gives the viewers the connotation of an evil, sad, scary setting. The colours used also links with the lightening used upon the characters face as the main characters in the begin are shown to have lightening usually based on high key allowing us to see the expressions on the characters face once they realise they are going to die. Whilst the episode continues we continue to see and hear music we are more aware of what is going on. The shots used are usually close ups and medium close ups of the characters these are used to give viewers the outline and a detailed image of there face allowing us to see how they feel.
Whilst we see both characters having a discussion in the beginning we see something may unexpected may happen as the phone rings and she is alone. This is then followed will water on the floor. Whilst the character walks up the stairs to see what is going on we see the representation of the doors are dark and wet which is shown to be open, at this point the tension is building up. The television is shown to come on repeatedly where we then see the girl is frightened and then dies. The lightening at this point is bright and the music is sudden making the audience want to know what will happen  next and weather anyone else will die.


The Ring Trailer

Above is shown to be the trailer of the ring.

Health and Safety

After learning about film openings and analising them, we were to get some practise using the camera's, before doing this we were given a health and safety tutorial.

It is essential that the camera's are looked after properly when filming, for example if it is raining, we must make sure to keep it inside the bag, and not carelessly leave it anywhere. We were shown how to place the camera's securely on a tripod, so it doesn't fall off.

We learnt how to insert and take out the memory cards, so that every time we film our work is saved. We also learnt the very basic, which was how to actually turn the camera on and off, and the button which records.

We also learnt how to film some basic shots and how to zoom in and out.

Conventions of Film openings


Film openings have to have certain aspects in order for the film to be a success. There are certain conventions that are included in film openings allowing viewers to generate an idea of what to expect.

  • The location is one convention that film openings should have. Having a location gives viewers the idea of where your film will be set allowing them to generate a specific idea of what they are likely to accept whilst watching the film.
  • The music as well as sound is important as it sets the mood to the opening of the film allowing the audience to feel the way the characters in the play want us to feel, making us involved and connected with the characters in the play. The music is also linked with the tone playing a significant part, the mood of the film must link with the film otherwise we will see viewers may find it boring such as characters that are playing serious parts the tone should be up- beated, slow music to show the tension towards the audience not happy music as it doesn't fit in the sequence.
  • Having credits and a title is also a convention that is used often through the beginning of film openings. Credits usually appear as a list of names which allows viewers know who is in the film. 

  • Looking at various amounts of film openings we see all of them introduce the audience to the main character and gives us a clear sense of the storyline set. This allows people to see who the main focus is on and make them generate a brief idea of what the story could be based on.


Monday, 12 December 2011

Example Thrillers


Thriller examples
Researching was a key aspect that needed to be completed in helping us complete our work. Whilst looking at existing thrillers it enabled us to see the different types of shots and what they focus on. Whilst looking at most of the clips as shown below they had many things in common which were mostly the lightening, sound and also the types of shots that are used. The lightening of most thrillers as shown were all dark and bright on the main character which enables us to focus more on the main character allowing us to feel curious in what could happen behind them. Most thrillers use cuts quiet often, sudden music and close ups these are used to make the audience excited and feel tension of what could happen next.


This is the start of 'The Ring' here we are shown to come across different sounds, edits and also camera shots. The sound in the begging is shown to be calm however is then shown to build up allowing the audience to feel the tension in what will happen next. The sound track of the ring is shown below. Throughout this track we see the instruments used clearly makes viewers feel that something may happen making them aware when they watch the clip of the first episode as shown in the links below.


Psyco is also another classic thriller. This is shown to have various amount of features making us feel scared and excited. most of the shots used are close ups of the characters face showing detail emotion of the way they feel. Below is shown to be the sound track. This soundtrack is more sudden from the one above making the viewers clearly expecting something shocking.

We clearly see whilst looking above at all the opening of thrillers they all show to have many things in common making them successful. All these show to make the audience engage and make them want to watch more of the film.

     (Psyco soundtrack)
  (Inception sound track)


  (Inception opening scene)


 (The Ring soundtrack)


 (The Ring opening scene)

Overall throughout these thriller/ horror opening scenes, we see that the setting, sound, editing, and camera shots are key conventions  in making a thriller a success.

Story broad Outline (collateral)

Collateral was the film that our group chose to do our task on. The task was based on us re creating the story board where we then were told to re- act the scene with our group members. This task involved us using the skills that we were told about the cameras. Whilst watching the opening clip from Collateral we then had to link this to a story board where our group was able to look back upon and base the filming on this.

There was 2 main characters in this episode where the camera was focused on most of the time.
Above is shown the story board i created showing various amounts of shots that were used in the clip. firstly we see a long shot has been used where the rest of the characters in this scene are blurred out as they are not the main focus. Using this shot in the opening of the clip it makes the audience see how significant the character is and makes us want to know where the main character is heading to. Using a long shot makes the audience have a wide shot of where the scene has been set and creates a clear image of what could happen next

We then go onto the second shot where we see the character coming towards the camera again seeing most of the characters behind him being shadowed as he is shown to be the main focus in this part of the scene. Characters being blurred clearly indicates there insignificance and making the audience wonder why it has been used. This shot has been used continuously to show the characters journey to his destination, whilst walking through people showing that he is there main focus at this point. The shots then seem to over lap where we see the second character walking as well this makes the audience have the feeling that the characters at some stage will meet which is shown to happen latter on.

Through the third scene we see a medium close up of the character. A medium close up is used to generate a more and clear detailed image of the main character, using this shot also shows viewers some detail about him in which this case we see the character is wearing a suit looking sophisticated giving the audience the implication that he is a wealthy man. This shot also makes the viewers generate stereotypes of characters e.g. weather they are wealthy or poor.

A over the shoulder shot is then used to show the interaction between both characters. An OTS is usually used to focus on the character who is speaking show the viewers from different views. At this part where we see the characters having a discussion we see that they both show to have several things in common e.g. the way that they dress (suits) gives the connotations of rich wealthy people.

The last shot we see a extreme close up of the characters face continuing to walk after the convocation he has had again with the characters in front being blurred as he is the main focus allowing the audience to reflect upon.

This task overall was useful as i was able to focus on the shots and put it on the storyboard allowing me to then put it in our own group work and then discuss the effects on what it had on the audience. Doing this task also made me realise the different shots and what shots are used to create a more effective beginning

Health and Safety lesson introduction

Health and Safety was what we had to go through to ensure that we knew how to use the cameras before we were in charge. The health and safety lesson included various amounts of skills and instructions that we needed to take on broad, giving us a chance in being able to understand how parts of the camera worked.
Through the lesson we were told rules that were essential about the cameras as listed below:
   Ensure that the camera is protected from the weather (never leave the camera out in the rain to get wet)
 Treat the camera with care , as if it was your own be sensible and use it appropriately and  sensibly.
   Always ensure the camera your in charge of is in a safe place.
    Ensure that you return the camera in college at the time set by the teacher so that other people will be able to film in there lessons.

(Following these rules are important as the camera is our responsibilities meaning if they are not followed we will not be trusted.) 
The most significant rule we had to follow as a group was taking care of the cameras making sure that it was protected (in the rain- it should be in its bag) and kept in a safe place. This was a vital part our group will have to follow as the cameras are worth up to £2,000 each meaning that we will all have to contribute towards.

We also found out that we were not advised to use the zoom in button whilst filming , this was because we were told that it doesn't look effective and is usually hard to use. We were also told not to use this as we were told we should use various amounts of shots such as a close up , extreme close up etc to give a more detailed and interesting effect.

We were first taught how to insert the memory card and battery into their slots A and B. This was vital as we needed to know how to do this otherwise inserting it the wrong way will of resulted us in damaging the card which could result in us loosing the work done or potentially damaging the camera. Whilst we were told this we then took part in an activity were we ensured all members knew exactly how to do it.

We then learnt how to set-up the tripod in which the camera is placed on correctly. The tripod was the stand used to place the camera on this is used to give a more accurate view in filming.  Whilst setting this up we found out it was important that the legs were all equal and straight to avoid getting a wonky/ unbalanced shot. We also learnt the different buttons and functions of the camera when constructing it to the tripod ensuring that it locked into place before we started filming preventing any damage. Once we were told all this we tried it out again ensuring all members of the group knew what they were doing 

We also learnt how to zoom in out and use various functions on the camera. Whist looking at the camera we were told how to turn the camera from auto to manual and vice versa, we also were told how to play back footage once recorded. Within the health and safety lesson we learnt a few shots and how they should be done. One example was an OTS whilst this was shown we had to make sure the camera was at the right angle and not to above the subject insuring the camera was still avoiding a blurred image.

Once we finished the Health and Safety lesson we then took part in an activity which involved us taking various amounts of shots of members in the group, with the different camera shots and rules of the camera then presenting them in a presentation. This aloud us to work independently with the cameras allowing us to reflect upon what we learnt, that overall went well.

Shot by Shot Remake: Storyboard Plan Photos


Storyboard Photos of Collateral clip


Our next task was to choose a clip from either the film Collateral made in 2004 or The Killers made in 2010. We have to recreate the clip as closely as possibly in terms of frame and story.


I made a storyboard sketch plan of the 44 second sequence of the film following frame by frame in seconds. I sketched the positions of where the characters were in that shot, which character it was and what was happening in that shot, so when we film it we would know how to recreate it to a good standard.

Page 1, frames 1-6


Page 2, Frames 7-10
 the cameras allowing us to reflect upon what we learnt, that overall went well.

Sunday, 11 December 2011

Wednesday, 7 December 2011

Introduction to cameras

After the health and safety tutorial we used the cameras for the first time, to practise and experiment with different types of shots.


This is a wide shot, which shows an area, sometimes with a character in it, showing them in full length. Wide shots can be used to set the scene.

    
This is a close up, close ups can be used to show a character's emotions.


This is a over the shoulder shot, where the camera shows things from the shoulder of a character, this type of shot can be used when two characters are in conversation.

Introduction to cameras

BCU (big close up) of someones face
The first shot that we took was a (tight) big close up of someones face, the BCU enables us to see detail upon the characters face allowing us to see the expressions put forward that is taken from the forehead and chin. For a shot of a person, a BCU will include the eyes and mouth but not the whole head as shown above. Having a BCU used in a thriller will allow the audience to focus upon the characters facial expressions mainly focusing on the persons feelings and reactions to certain situations depending on where it as been set in which this case a thriller would be scary. The background whilst this shot is used will not be bright and effective as we see the the main focus is the characters face and not where it has been set. Finally BCUs emphasise specific moods and create tension towards the audience as they rarely see anything else but the characters face (expressions).
Wide Shot of an area 
The second shot was a wide shot of an area. Using a wide shot gives us a broader view of the surroundings around the characters giving clear detail on where it has been set and why it has been set in that specific location. This wide shot shows us not just the character but also what is going on around her. A wide shot is effective as it creates tension for the audience as they are not sure what will happen making them engage with films more. Looking at this shot the lightening is also shown to be the focus point creating the mood, as we see the lightening is focused upon the character where the audience will focus on more.

Tracking (shoot of feet)
Tracking is used to follow a certain object or action. Whilst tracking, it makes the subject focused allowing people to see the focus of the object in which this case is the movement of the persons feet. The speed of tracking determines the way the mood is set as if we see fast tracking it connotes a fast paced action allowing the audience to feel the excitement of what could happen. However if we see the tracking to be slow it shows the audience the mood of feeling tense. Tracking is used frequently in thrillers as it goes with the theme of letting the audience focus on what has been set. We see this because the audience are looking up from the ground, and is meant to give the viewer the feeling that they are looking up at the character from way below and it is meant to show them at the same level.
Rule of thirds

The rule of thirds is illustrated in different ways to create various amounts of meanings and create special effects. The rule of thirds is where an image is illustrated and divided into three or more equal parts depending on where the scene has been set and the emotions carried out. This shot also allows you to make your image well balanced and helps the viewers naturally move through an image. The rule is based on different movements allowing different effects to be created. Through this rule of three we see there is two people on each side showing things from there point of view, looking from the left side we see the person is shown to be looking up to the person on the right. The person on the right however is given the view to look down on the person on the left giving different connotations. The rule of the clearly sets out the position of characters and allows the audience to see things from different angles seeing the characters and the main setting of the scene.
OTS (Over the Shoulder)
An OTS (over the shoulder shot) is most commonly used whilst two people are having a convocation and the camera is focused on one character allowing viewers to focus on one actor at a time rather than both. Using an over the shoulder shot as shown above, makes us see what the main focus is at this point, which is the character facing the camera. Even though we see one of the characters face we still see that parts of the other character which suggests that they must be involved in this part as well. This shot also allows us to see things from different viewpoints and allows us to stay in focus with what is going on, as we can also see parts of the background allowing us to see where it has been set.

Window Shot (effect from lightening)
The window shot as shown above shows different types of lightening upon the characters face. As shown above we see that the lightening of the characters face is reflected upon what she is looking at outside the window. The effect that this has allows the audience to reflect upon the character allowing them to build up a mood whilst looking outside. Lightening is an important aspect as it creates the mood weather being tense or relaxing, lightening is usually based on being high or low key in which this case it is high key and is based on bright outside but low key behind the character.